
Google How to Use the Thunderbird Email System (Gmail)
This page explains how to use the G Suite based mail system, which came into service in the second half of the 2019 academic year, from Thunderbird. If you want to use a mail client other than Thunderbird, please see this other page.
Introduction
The setup consists of the following three stages.
- Check your lifelong address for G Suite
- Change the Gmail settings so that IMAP can be used
- Configure Thunderbird to use Gmail
Check your lifelong address for G Suite
G Suite identifies users by email address for authentication, such as when logging in. The address used for this is the one in the form “surname.givenname.two-letters@tut.jp” shown on your account information notice.
If you have been a user since before October 2019, or if you have forgotten your lifelong address for G Suite, please check theProfile Maintenancepage, in the “Lifelong email address for G Suite” field.
Changing the Gmail settings so that IMAP or POP can be used
- these instructionsand log in to Gmail from a web browser.
- step 1 of these instructionsand enable IMAP or POP.
Configuring Thunderbird to use Gmail
1. Choose “Account Settings” → “Add Account”.
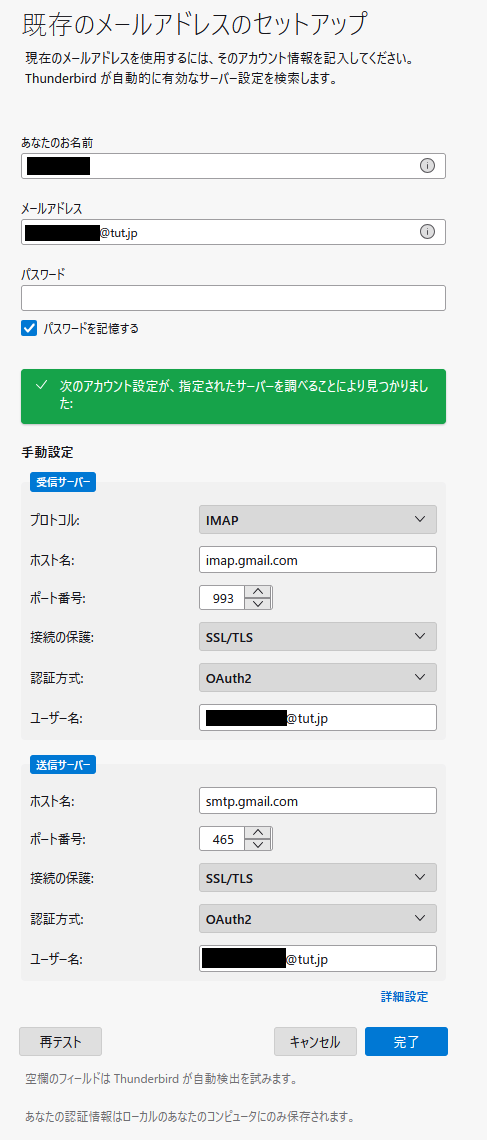
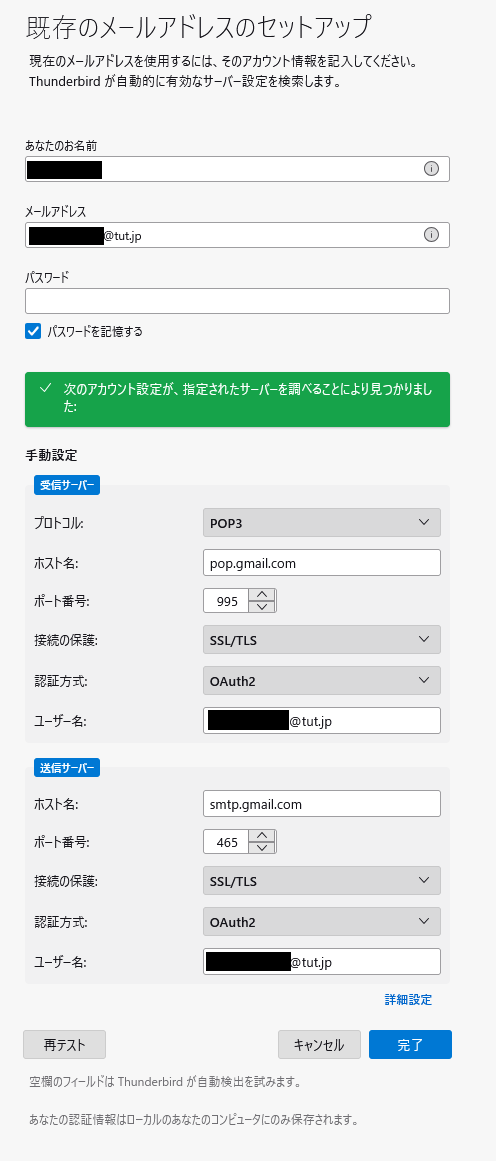
2. Enter the settings below and click Done.
- For IMAP
- For POP
4. You are taken to the Google login screen. Enter your lifelong email address for G Suite and log in usingthe same procedure as when logging in to webmail.
5. Once you have logged in, you are asked to authorize access to your Google account. Choose “Allow”.
6. If you are asked to confirm a security exception, accept it. The setup is then complete.