
Hosting Web Server
This page provides FAQ about the web server on the shared server. If you have any questions or requests before using the shared server, please send an email to supports_at_imc.tut.ac.jp. If you have any questions or requests after using the shared server, please send an email to jointserver-users_at_lists.imc.tut.ac.jp or add them at FAQ.
How much space can I use on the server?
You can upload up to 10 GB of contents.
How can I upload a file to the server?
WebDAV server is working on the shared server. See pages like http://www.atmarkit.co.jp/flinux/special/webdav/webdav02b.html and use a proper WebDAV client (in case of Windows, Web Folders).
To use Web Folders on Windows Vista, you need to apply Windows hotfix or install another WebDAV client. For details, see the below page.
Web Folders for Windows 7 has a known issue that it cannot access a WebDAV server using BASIC authentication. Although it is possible to avoid the issue by configuration, the configuration is so complicated that we cannot recommend it. Using a proper WebDAV client will be easier. For example, how about downloading any WebDAV client?
I cannot upload a file on Windows.
WebDAV is used on the shared server. Although the URL of the upload destination is https://imc.tut.ac.jp/dav/example.imc.tut.ac.jp/htdocs/, files cannot be uploaded to the destination using Internet Explorer. See pages like http://www.atmarkit.co.jp/flinux/special/webdav/webdav02b.html and make sure to use a proper WebDAV client (in case of Windows, Web Folder).
I cannot overwrite, rename or copy an existing file.
When some WebDAV client software for Mac OS X or Linux is used together with the WebDAV server of the shared server, sometimes it is not possible to overwrite, rename or copy. This is caused by the limitation of the WebDAV server implementation, and it is quite difficult to resolve now.
Although client software having such limitations is used, you may create new files and delete existing files. Accordingly, you may edit or rename a file by copying the file to a local disk once, editing or renaming the file on your local machine and writing the file again on WebDAV folder.
Please avoid the issue with the workaround above for now. Sorry for your inconvenience.
I want to give permission to users who are not the domain administrator to upload a file.
Create a file with the name “. htdavgroup” in the folder (directory). In the file, add user accounts that are permitted to upload to the folder and subfolder. One user account constitutes one line.
The domain administrator can upload files regardless of the setting in .htdavgroup.
Are there any characters that cannot be used in the name of a file or a folder?
Characters that are reserved as special characters in RFC3986 cannot be used.
: / ? # [ ] @
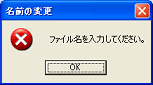
I cannot create a file with a name starting with a “.” (period) in Windows!
This is caused by the limitation of Explorer. Renaming a file that is already uploaded also causes an error like below.
This issue can be avoided by taking the following steps.
- Open a file having a proper content with Notepad, etc. and save the file on a local disk (e.g., desktop) by selecting “Save as.” The file should be saved with the name you want, such as .htaccess and .htpasswd.
- Drag and drop the created file to Web Folder.
Can I use Japanese characters in file names or folder names?
Although the server can be configured to use Japanese characters, it is not recommended.
Currently, no standard is defined for how to send URLs that contain Japanese characters from a browser to a server. Thus, the behavior varies depending on the browsers, and a page that is displayed on some browsers often cannot on another browser.
Can I set access permissions?
Yes.
When access permissions by password are configured for a web page, use digest authentication. Basic authentication allows a password to be sent in clear text. For example, writing .htaccess as below, permissions by password using digest authentication are set. The file name of AuthUserFile should be replaced with a proper file name.
AuthType Digest
AuthName "private area"
AuthUserFile /var/www/htdocs/.htdigest
Require valid-user
BrowserMatch "MSIE" AuthDigestEnableQueryStringHack=On
Since Basic authentication has an issue that the authentication information in clear text is transferred on network path, it cannot be used on the shared server by configuration.
Can I create pages that can be accessed only within the University?
Yes.
Put .htaccess having the following content in the folder (directory) you want to limit access to.
Order Deny,Allow
Deny from All
Allow from 133.15
Be careful of the format of Order directive. There is a half-width comma, instead of a blank, between “Deny” and “Allow.”
Can I create a CGI for sending emails?
Yes. Please carefully design the CGI to prevent others from abusing it for malicious purposes.
A sendmail-compatible program is installed in /usr/lib/sendmail. However, it is not recommended to call the program directly. (The path may be changed in future.)
In case of a perl script, programs like Mail::Sendmail are recommended. Mail::Sendmail is already installed on the shared server, and it can be used only by describing as below.
use Mail::Sendmail;
In case of PHP script, email can be sent via sendmail command using mb_send_mail function. Since mb_send_mail function is also a wrapper of the mail function, see the explanation on mail function. These functions are provided by default, and no special operation is needed to use them.
Can I use jcode.pl in the CGI?
Absolutely NO. jcode.pl was designed for Perl4. You should use Encoding module designed for Perl5 instead of it.
Can I put CGI in a directory besides /cgi-bin/?
Yes. Put a file having “.cgi” suffix in any directory. In addition, put .htaccess file having a content like below in the directory.
Options +ExecCGI
Is it possible to show a page written in PHP?
Simple answer: Yes, it is possible. Put a file having “.php” suffix in any directory and put .htaccess file having a content like below in the directory.
Options +ExecCGI
Complicated answer: Yes, it is possible. However, mod_php is not installed on the shared server (because mod_php is not thread-safe and worker MPM cannot be used). Instead, mod_fcgid is installed on the server, and the server is configured to interpret and execute a file having “.php” suffix as CGI. Thus, in the directory where execution of CGI is not allowed, a file having “.php” suffix is not processed, and the above-mentioned .htaccess file is needed.
Can I view the access log?
The access log can be checked on the web page: https://imc.tut.ac.jp/log/<domain name>/
Can I use CMS?
For hosting service, a stable version of Debian GNU/Linux is used as a base system. Accordingly, CMS contained in a stable version of Debian GNU/Linux can be relatively easily used. Please consult the mailing list: jointserver-users_at_lists.imc.tut.ac.jp. Applicable CMS includes:
- Drupal6
Can I use Wiki?
I would like to update the certificate of a website where Shibboleth authentication is implemented. (for VM)
On a website where Shibboleth authentication is implemented, if the certificate is not updated in a correct method, authentication cannot be made after the certificate is updated.
In addition, the certificate cannot be updated only by the server administrator. Operation at the Information and Media Center is also required.
The following explains two procedures for updating certificate. The first procedure is to update the certificate without stopping Shibboleth authentication. Although Shibboleth authentication does not stop, operations must be divided and performed within 3 days. The second procedure is to update the certificate while Shibboleth authentication is temporarily disabled for several hours. Instead, the operation will be completed within a day. Considering the work system and tasks, choose this procedure.
Procedure for updating certificate 1 (Without stopping Shibboleth authentication)
Step 1 (Operator: website administrator)
Access https://imc.tut.ac.jp/beta/upki/action/start and obtain a new certificate and a secret key.
- Replace the certificate and secret key used for Apache on the website. Do not delete the old certificate and old secret key because they are required in this operation.
- Configure Shibboleth SP to use the new certificate and secret key for decryption.
- Find the following lines in /etc/shibboleth/shibboleth2.xml.
<CredentialResolver type="File" key="旧秘密鍵ファイル名" certificate="旧公開鍵ファイル名"/>
- Modify the lines as follows.
<CredentialResolver type="Chaining"> <CredentialResolver type="File" key="新秘密鍵ファイル名" certificate="新公開鍵ファイル名" use="encryption"/> <CredentialResolver type="File" key="旧秘密鍵ファイル名" certificate="旧公開鍵ファイル名"/> </CredentialResolver> - Restart shibd.
% service shibd restart
- Find the following lines in /etc/shibboleth/shibboleth2.xml.
- Notify the Information and Media Center that the operation is complete.
Step 2 (Operator: Information and Media Center)
- Register the new certificate in the metadata as a backup key.
- Contact the website administrator.
Step 3 (Operator: website administrator)
- Configure Shibboleth SP to mainly use the new certificate and secret key.
- Change the location of ‘use=” encryption”’ in /etc/shibboleth/shibboleth2.xml.
<CredentialResolver type="Chaining"> <CredentialResolver type="File" key="新秘密鍵ファイル名" certificate="新公開鍵ファイル名"/> <CredentialResolver type="File" key="旧秘密鍵ファイル名" certificate="旧公開鍵ファイル名" use="encryption"/> </CredentialResolver> - Restart shibd.
% service shibd restart
- Change the location of ‘use=” encryption”’ in /etc/shibboleth/shibboleth2.xml.
- Notify the Information and Media Center that the operation is complete.
Step 4 (Operator: Information and Media Center)
- Remove the old certificate from the metadata.
- Contact website administrator.
Step 5 (Operator: website administrator)
- Delete the old certificate and old secret key from Shibboleth SP.
- Modify /etc/shibboleth/shibboleth2.xml as below to restore the original content.
<CredentialResolver type="File" key="新秘密鍵ファイル名" certificate="新公開鍵ファイル名"/>
- Restart shibd.
% service shibd restart
- Delete the old certificate and old secret key.
- Modify /etc/shibboleth/shibboleth2.xml as below to restore the original content.
Procedure for updating certificate 2 (Stopping Shibboleth authentication is required.)
Step 1. Replace the certificate and a secret key used for Apache.
Step 2. Modify the certificate part in /etc/shibboleth/shibboleth2.xml as follows.
変更前:
<CredentialResolver type="File" key="旧秘密鍵ファイル名" certificate="旧公開鍵ファイル名"/>

変更後:
<CredentialResolver type="File" key="新秘密鍵ファイル名" certificate="新公開鍵ファイル名”/>
Step 3. Restart Shibboleth.
# service shibd restart
Step 4. Notify the Information and Media Center that the operation is complete.
Server certificate issuance/renewal procedure
Step 1: Obtain the following information in advance.
- Server host name (e.g. kyomu.office.tut.ac.jp)
- If the server is operated under a different name, that name (eg www.kyomu.office.tut.ac.jp)
- Server software name and version (e.g. Apache 2.2.16, IIS 7.0, etc.) * Apache 2.4.25 for hosting services
Step 2: Access the UPKI SSL server certificate web page.
Step 3: "A: Generate Certificate Request (CSR) and private key" → Enter "host name of the server where the certificate will be installed" Click the "Generate CSR and private key" button.
Step 4: Click the "Download private key" button.
For kyomu.office.tut.ac.jp, a file named kyomu.office.tut.ac.jp.key will be generated.
Step 5: Click the "Next" button.
Step 6: Enter the name of the server software that uses the certificate and its version.
If you are using a server with a different name, click the "Add server alias input field" button and enter the server alias in the displayed "Server alias for installing certificate" field. For example:
Step 7: Click the "Request" button.
Step 8: Confirm that an e-mail stating "I submit the following certificate request" has been sent to the Information Media Center (to the IMC) (I am also on CC).
In the case of kyomu.office.tut.ac.jp, the email subject will be as follows.
- New: "NEW CSR for kyomu.office.tut.ac.jp"
- For updates: "UPDATE CSR for kyomu.office.tut.ac.jp"
This email will be received by the IMC and the work leading to step 9 will be performed, so the user should confirm that the email has been sent and wait for the email in step 9 to be received.
Step 9: After the SSL server certificate has been issued, you will receive an email to that effect.
Step 10: Download the server certificate according to the contents of the email.
The subject of the email is "[UPKI] server certificate issue acceptance notice". The download file will be kyomu.office.tut.ac.jp.cer.
Step 11: Put the issued "private key" and "server certificate" in a USB memory and bring it to Information Media Center 2F 203 Shimojo.